1. Working on the Terminal
By the end of this guide, you will know how to use the terminal to navigate your file system and run commands.
Why terminal?
The terminal is essential for:
- Running Git commands to track and share your code
- Installing and managing packages (Python, R, etc.)
- Running scripts and development tools
- Using Chap
What is the Terminal?
The terminal (also called the command line, shell, or CLI) is a text-based interface for interacting with your computer. Instead of using a graphical interface, such as File Explorer or Finder, you type commands, such as ls, which list items in your current directory.
- Shell: The program that interprets your commands (e.g., bash, zsh, PowerShell)
- Terminal: The window where you type commands
- Command: A text instruction like
ls(list files) orcd(change directory)
How to open/use the Terminal
Windows
To use Chap on a Windows machine, you need to install the Windows Subsystem for Linux (WSL). WSL allows you to run a Linux environment on your Windows machine without the need for a separate virtual machine or dual booting. Read more about WSL here.
The reason Windows users need to use WSL is that Chap depends on software that is difficult to install correctly on a native Windows system. Therefore, we use Windows Subsystem for Linux (WSL), a Windows feature that allows a Linux distribution to run within Windows, providing a Linux environment in which Chap and its dependencies can be installed and used reliably.
How to install WSL
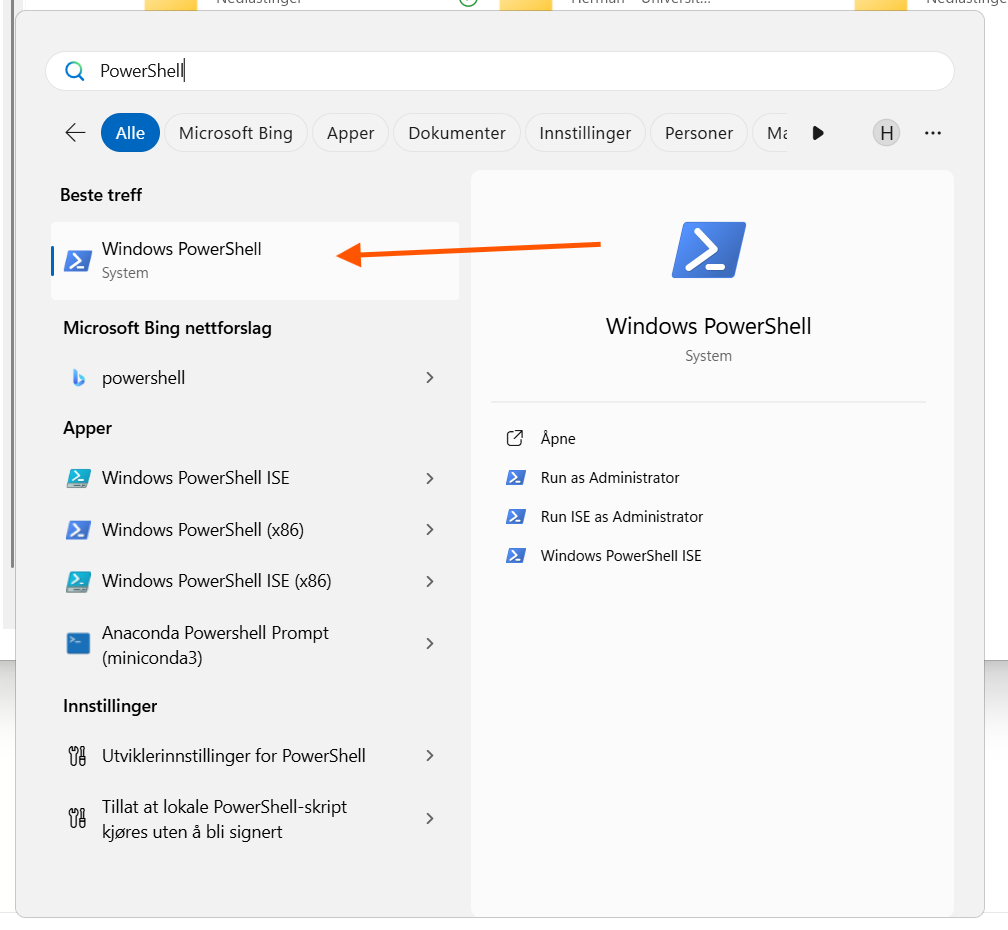
-
Start PowerShell by searching for it in the Start Menu in Windows
-
Within the shell, execute the following command, and create username and password as promted.
-
After the installation is finished, close PowerShell and restart your computer.
-
Reopen PowerShell and you can start WSL by executing
wslin PowerShell. This will start WSL and bring you to a linux command line interface, where you could execute Linux commands. -
Verify: To verify everything works, you can try to execute
unamein WSL. This should print "Linux", as shown below.
 !
!
!!When continuing this tutorial, ensure you always execute commands within WSL, and not by using PowerShell.
Mac
Open the Terminal application.
On macOS, you can find it in Applications → Utilities → Terminal, or search for "Terminal" using Spotlight (CMD + Space).
Installing Homebrew
In the next lesson regarding git and github, you will need the brew command. Homebrew ("brew") is a package manager for macOS that makes it easy to install and manage software.
If you don't have Homebrew installed, install it by running:
Verify Homebrew is installed
Run:
Expected: prints a Homebrew version string (e.g., "Homebrew 4.x.x").
Re-run brew --version. If still missing, install Homebrew from https://brew.sh and restart your terminal.
Linux
Open your terminal, and you should be good to go to continue to the next section.
IDE (Integrated Development Environment)
We recommend you use an IDE, or at least a text editor, such as Notepad or VIM, to edit and navigate between files. We recommend you install Visual Studio Code (https://code.visualstudio.com/). If you use WSL, select installation for Windows. After installing, you can open your project folder in Visual Studio Code from File → Open Folder, or run the following command in your terminal.
TIP: Visual Studio Code also comes with an integrated terminal, making it easier to see, edit, and use the terminal within one application.
Visual Studio Code screenshot

List of basic Commands (works on Mac, Linus and WSL)
| Command | Description |
|---|---|
pwd |
Print working directory (show where you are) |
ls |
List files and folders |
cd <folder> |
Change directory |
cd .. |
Go up one directory |
mkdir <name> |
Create a new folder |
touch <file> |
Create a new empty file |
cat <file> |
Display file contents |
cp <src> <dest> |
Copy a file |
mv <src> <dest> |
Move or rename a file |
code . |
Open default Code Editor |
Navigation Tips
- Use
Tabto autocomplete file and folder names - Use the up/down arrow keys to scroll through previous commands
- Use
Ctrl+Cto cancel a running command - Use
clearto clear the terminal screen
Exercise
Complete these tasks to verify your terminal is working:
1. Open your terminal
- macOS/Linux: Open Terminal
- Windows: Open WSL
2. Check your location
Verify: You should see a path like /home/[your-username] or /Users/[your-username]
3. List files
Verify: You should see files and folders in your home directory
4. Create a test folder
Verify: The path should now end with terminal_test
5. Create and view a file
Verify: You should see hello.txt listed
6. Clean up
Warning: The command
rm -r terminal_testwill permanently delete theterminal_testfolder and everything inside it, without asking for confirmation. Be very careful when usingrm -r—double-check the folder name to avoid deleting important files or directories.
Verify: The terminal_test folder should be gone
If all verifications passed, you're ready for the next guide: Git and GitHub
Extra Reading
- Linux Command Cheat Sheet - A comprehensive list of useful Unix/Linux commands